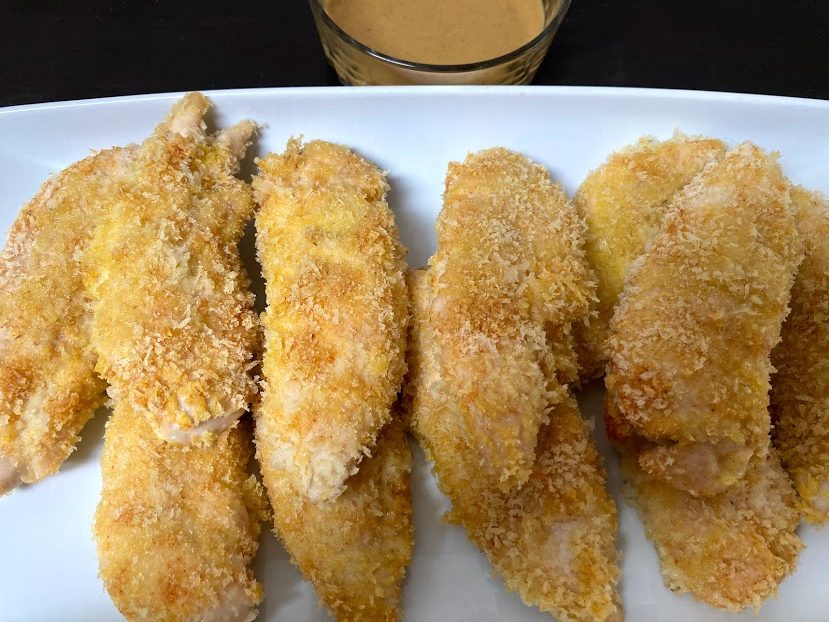
Chicken Tenders/Chicken Fingers are definitely my go-to fast food weakness. These days I’m not eating much fast food, but that doesn’t mean every once in a while (or maybe more often than that), the craving for some crispy, crunchy chicken tenders doesn’t hit. These are a perfect fix. These chicken tenders are crunchy, crispy but baked instead of fried. Coated with seasoned flour, egg and finally panko breadcrumbs then baked at a high temperature and lightly sprayed with oil gives them a golden crispy outside like it’s fried counterpart. I kept the seasoning for the flour plain but with enough flavor to be delicious on their own. But I also have suggestions below to add any seasoning and some flavor combinations. There really are so many options to enjoy these; for lunch, dinner, in salads, in a sandwich, or just for dipping in any favorite sauce. Only 15 minutes of quick prep then 17-20 minutes baked in the oven and they are ready!
Options, Substitutions and Tips!
- I like using Chicken Tenderloins best for this recipe because they naturally come in the right shape so no chopping/cutting is required. However, Chicken Breast can easily be substituted and work just as well, they will just need to be cut into the smaller long strips.
- Sometimes the Chicken Tenderloins have the tendon still attached (it’s sort of this white, rubbery, little nub at the top of the thicker end). It’s best to remove this because it is tough and chewy and not nice to eat. To remove, take a sharp knife and cut away at the chicken surrounding it.
- I keep the seasoning for the flour fairly simple. To me the salt, paprika and garlic powder, give enough flavor, and then can be enhanced with whatever sauce/dip I want to add after they are cooked. If you want to kick up the seasoning, you can add some crushed red pepper, Cajun seasoning, chili powder, or any favorite seasoning to the flour.
- No non-stick oil spray? no problem. I used a non-stick olive oil spray, but if you do not have any non-stick spray, you can mix the panko breadcrumbs with a little bit of oil or melted butter prior to coating the chicken. It will work best if you heat a little bit of oil/butter in a microwave bowl (2 Tbsp. should do it) and then add the panko breadcrumbs and toss with a fork. Mixing the panko breadcrumbs with oil/butter will achieve the same result as spraying with oil, ensuring they toast to a crispy golden color while baking. With both methods, the more oil you use the more golden brown and crispy the tenders will be, but also the more unhealthier-ish they are, so it’s really up to you on what balance you are looking to achieve.
- Do I need to use parchment paper? I have never tried making these without parchment paper. The parchment paper really does prevent the chicken from sticking to the baking tray so you do not loose any of the outside coating. Because I recommend spraying the parchment paper with a little bit of the olive oil, you also do not need to flip the chicken in order for both sides to brown.

- Option to convert to Coconut Chicken Tenders-follow all the same recipe steps, but lessen the Panko breadcrumb amount to 3/4 a cup and add 1 cup of shredded coconut. Mix the panko breadcrumbs and shredded coconut into that 3rd bowl to coat the chicken and then bake. The panko breadcrumbs and shredded coconut will toast in the oven and it is amazing dipped in a sweet chili sauce.
- Sauce combinations are endless but a few of my favorite sauce combos are: Buffalo Hot Sauce and Blue Cheese, Creamy Chipotle Sauce, Sweet and Sour Sauce and Honey Mustard sauce-seen here:

- These will last in the refrigerator for 3-4 days. They also freeze very nicely. For best frozen results eat within 3 months (or before any freezer burn sets in). To freeze, first let them cool down all the way and then place in an airtight container or plastic sealed bag.
Crispy Baked Chicken Tenders

These chicken tenders are crunchy, crispy but baked instead of fried. Coated with seasoned flour, egg and finally panko breadcrumbs then baked at a high temperature and lightly sprayed with oil gives them a golden crispy outside. Super versatile, these are great for lunch, dinner, in salads, or just for dipping in any favorite sauce.
- 3 bowls or shallow dishes, baking sheet, parchment paper
- 1½-2 lbs Chicken Tenderloin
- 1 large Egg
- 1 Tbsp. Water
- ½ cup Flour
- 1 tsp Salt
- ½ tsp Paprika
- ½ tsp Garlic Powder
- 1 cup Panko Breadcrumbs
- Non-stick Oil Spray
Pre-heat oven to 220°C/425°F. Line a Baking Tray Sheet with parchment paper. Spray parchment paper with non-stick oil spray
Set up work station with 3 bowls or 3 shallow dishes lined up next to the Baking Tray. In the first bowl mix flour, salt, paprika and garlic powder. In second bowl mix together egg and water. In third bowl add panko breadcrumbs.
One at a time, coat chicken tenderloin with flour on both sides. Next dip in egg mixture allowing excess to drip off. Then pat and cover with panko breadcrumbs on each side. Set on baking sheet.
Repeat process with all pieces of chicken. Spray top of chicken with non-stick oil spray.
Place baking sheet in oven and bake for 17-20 minutes, until outside is golden and crispy.
Serve with favorite dipping sauce, chop up to use in a salad, in a sandwich…these are great in any capacity!
See Options, Substitutions and Tips section for additional recommendations!


